
Two winters ago, I stood in my kitchen holding a cup of coffee that had gone cold twenty minutes earlier because I was too busy staring at my cabinets, doing math in my head. New cabinets: quoted at $9,000. New countertops: another $3,000 on top of that. I remember laughing out loud, alone, in my kitchen, at 7 a.m. There was no version of that budget that existed in my actual bank account.
So I did what a lot of us do when reality doesn’t match the Pinterest board — I got mad for about a day, then got curious. What if the kitchen didn’t need to be gutted? What if it just needed a few smart, well-placed changes? I gave myself a hard limit of $500 and six weekends. What came out the other side wasn’t a magazine kitchen, but it was my kitchen, and for the first time in years, I actually liked being in it.
If you’re standing in your own kitchen right now doing that same math, here’s everything I learned — the stuff that worked, the stuff that didn’t, and exactly where I’d spend the money if I were starting over today.
Why a Full Renovation Isn’t Always the Answer
There’s a quiet myth in home design content that a kitchen only “counts” as updated if you’ve torn something out. In reality, most kitchens don’t have a structural problem — they have a surface problem. The bones are usually fine. What’s tired is the paint, the hardware, the lighting, and the clutter that’s built up over years of just… living there.
Once I stopped thinking about the kitchen as “a renovation project” and started thinking about it as “a styling project,” the whole budget conversation changed. Renovations cost tens of thousands. Styling costs a few hundred, and a lot of your own time.
Start With an Honest Walkthrough, Not a Wishlist
Before spending a single dollar, I did something that felt almost silly: I walked into my kitchen like a stranger would. Not as the person who cooks there every day and stops noticing things, but as a first-time visitor. What would they see first? What would bother them? What would they compliment?
That walkthrough told me the truth. It wasn’t the cabinets that looked dated — it was the brass hardware from the ’90s and the yellowed light fixture over the sink. The bones were solid. The details were the problem. This single exercise probably saved me $2,000 in changes I didn’t actually need to make.
The Changes That Made the Biggest Difference
Paint Is Still the Most Underrated Tool in the House
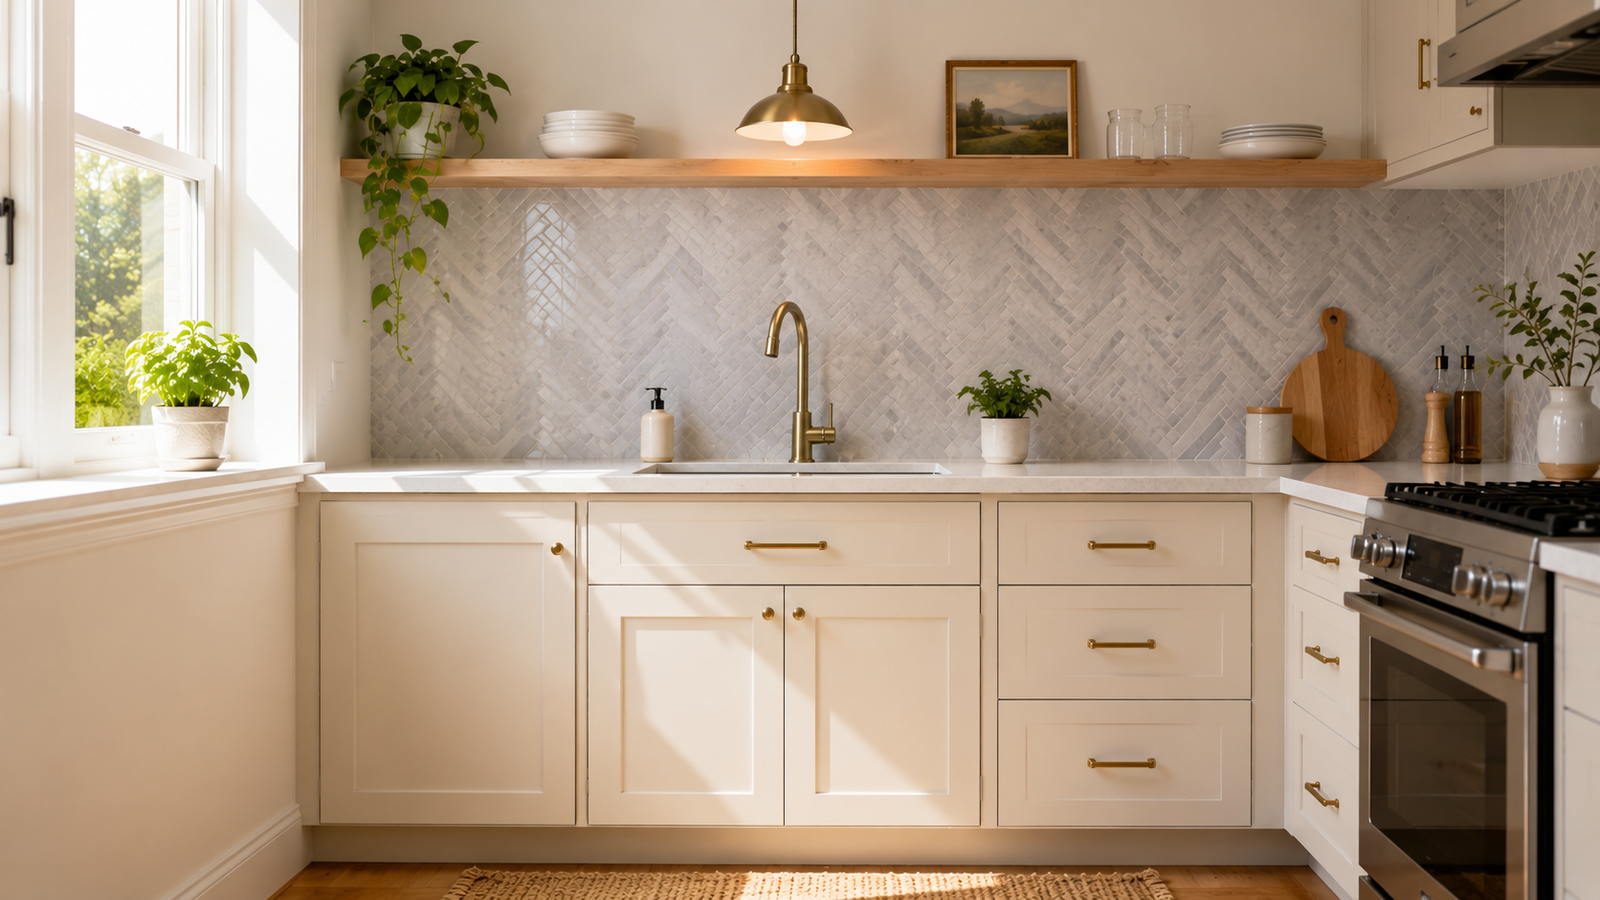
I know, you’ve heard this before. But I want to be specific about why it worked so well. I didn’t repaint the whole kitchen — I painted just the lower cabinets in a soft, warm off-white and left the upper cabinets alone. That contrast alone made the room feel intentional instead of dated, and it cost me about $60 in paint, primer, and a decent brush. If you’re nervous about painting cabinets yourself, start with just the island or just one wall of lowers. You can always do more later, but you can’t easily undo a rushed full-kitchen paint job.
Swapping Hardware Is the Cheapest Facelift You’ll Ever Do
This was the single best dollar-for-impact change I made. Twenty-four brushed brass knobs and pulls cost me under $80, and the difference was almost embarrassing — like the kitchen had aged backward ten years overnight. If your cabinets are otherwise in good shape, this is where I’d tell anyone to start before anything else.
A Peel-and-Stick Backsplash Changed the Whole Mood of the Room
I was skeptical about peel-and-stick tile for years, assuming it would look cheap or peel at the corners within a month. I was wrong, at least with the better brands. I chose a simple herringbone pattern in a soft grey-white and installed it myself over a weekend for under $150, including tools. It’s held up for two years now with zero lifting, even behind the stove.
Lighting Fixed What Paint Couldn’t
The old flush-mount fixture over my sink was casting this flat, slightly yellow light that made everything look tired, including me. I replaced it with a simple pendant light for $45 and added a warm LED bulb. The whole room suddenly had depth instead of just brightness. If you only have $50 left in your budget after everything else, spend it here.
Open Shelving in One Small Spot, Not the Whole Kitchen
I didn’t remove all my upper cabinets — that felt like too much commitment and honestly, too much dusting. Instead, I pulled down one small cabinet above the coffee station and replaced it with two floating shelves for about $40. It gave the kitchen a breathing moment without turning into a maintenance chore. If you’re weighing this idea more seriously, it’s worth reading through the full breakdown of what open shelving actually involves day to day before you commit to more than a small section.
Textiles Are the Detail Everyone Forgets
A new runner rug and two tea towels that actually matched each other cost me $35 and did more for the “finished” feeling of the room than I expected. It’s a small thing, but it’s the kind of small thing that makes a space feel cared for rather than just functional.
Greenery, Even Fake, Adds Life
I’m not a plant person, if I’m honest — I’ve killed basil in record time. So I added one realistic faux trailing plant on top of the cabinets and a small potted herb (that I actually managed to keep alive) on the windowsill. Fifteen dollars, and the room stopped feeling sterile.
Where I’d Spend Differently If I Did It Again
If I’m being honest with you the way I wish someone had been honest with me, I’d skip the drawer liners I bought and never really noticed, and I’d put that $20 toward better cabinet paint instead of the budget brand I used, which needed a second coat I hadn’t planned for. Small lesson, but it cost me an extra weekend.
I’d also tell past-me to measure twice before ordering the backsplash tile. I underestimated by one box and had to wait four days for a reorder, which stalled the whole project right in the middle.
Key Takeaways
- A full kitchen renovation isn’t required to make a real visual difference — most kitchens have a styling problem, not a structural one.
- Hardware and lighting swaps offer the best return for the least money and effort.
- Painting just the lower cabinets creates contrast without the time or cost of a full repaint.
- Peel-and-stick backsplash tile has genuinely improved and can hold up for years when installed carefully.
- Small, deliberate touches like textiles and greenery finish a space in a way big purchases often don’t.
Frequently Asked Questions
Can you really update a kitchen for under $500? Yes, as long as the layout and cabinet structure are already in decent shape. This budget works best for cosmetic updates like paint, hardware, lighting, and backsplash rather than structural changes.
Is painting kitchen cabinets worth it, or should I just replace them? Painting is worth it if your cabinets are structurally sound and just look dated. Replacement only makes sense if there’s water damage, warping, or the layout itself doesn’t work for you anymore.
How long does peel-and-stick backsplash actually last? With a good-quality brand and a properly cleaned, primed wall, it can last several years, even behind a stove, as long as it isn’t installed in an area with constant direct water exposure like inside a shower.
What’s the single best low-cost change for a dated kitchen? Cabinet hardware, hands down. It’s inexpensive, takes an afternoon, and changes the visual age of the kitchen more than almost anything else at that price point.
Do I need a professional for any of these changes? Not for anything listed here. Paint, hardware, peel-and-stick tile, and light fixture swaps are all doable for a confident beginner with basic tools and a free weekend, though always turn off power at the breaker before touching any wiring.
You might also like:
- 10 Small Kitchen Wall Decor Ideas
- 15 Latest Green Kitchen Cabinet Ideas
- 15 Latest Small Kitchen Design Ideas
- Kitchen Tricks Professional Chefs Use Every Day
Editorial Disclaimer
This article reflects personal experience and general home styling suggestions and is intended for informational and inspirational purposes only. Results can vary depending on your kitchen’s condition, materials used, and local labor or material costs. Always consult a licensed contractor or electrician before undertaking structural or electrical work. This page may display advertisements, including through Google AdSense; PrimeBuzzHub does not receive compensation from any specific brand or product mentioned above unless otherwise disclosed.